
Mastering the Intracorporeal Knot: A Step-by-Step Guide for Residents
The intracorporeal knot is arguably one of the most challenging yet essential skills for any resident learning laparoscopic surgery. Unlike extracorporeal knot tying, which benefits from direct visualization and tactile feedback, laparoscopic suturing practice demands exceptional hand-eye coordination, ambidexterity, depth perception, and a profound understanding of tissue handling—all while operating through small ports with restricted movement.
Its mastery is not merely a technical checkbox; it’s a gateway to performing complex laparoscopic procedures safely and efficiently. This guide will break down the intracorporeal knot into manageable steps, offer best practices, and emphasize the deliberate laparoscopic training required to achieve proficiency.
The Foundation: Understanding the Principles
Before diving into the steps, it’s crucial to understand the underlying principles of intracorporeal knot tying, key to successful laparoscopic suturing:
-
Tissue Approximation: The primary goal is to bring tissue edges together securely without excessive tension, which can lead to tearing or ischemia.
-
Knot Security: The knot must be strong enough to hold without slipping, typically requiring a minimum of three throws for security, often more depending on the suture material and tissue.
-
Economy of Motion: Every movement should be purposeful and efficient, minimizing unnecessary instrument manipulation within the limited laparoscopic field.
-
Ergonomics and Triangulation: Proper port placement and instrument triangulation are paramount to comfortable and effective suturing.
Essential Equipment for Laparoscopic Suturing Practice
Consistent laparoscopic training is non-negotiable. A high-quality laparoscopic training box or surgical simulator is indispensable.
-
Laparoscopic Training Box: Look for a high-fidelity laparoscopic simulator with good camera visualization, adequate space, and secure mounting for various training modules. The GERATI Laparoscopic Training Box is specifically designed to replicate the challenging environment of the operating room, making it an ideal tool for residents to achieve competence in laparoscopic suturing.
-
Instruments: A high-precision needle driver, grasping forceps (fenestrated or non-fenestrated), and scissors are standard. Ensure the instruments are in good condition and match the scale of the surgical environment.
-
Suture Material: Start with a non-braided monofilament suture (e.g., 2-0 or 3-0 Prolene or Nylon) as it slides easily, making early learning less frustrating. Progress to braided sutures (e.g., Vicryl, Silk) later. Use contrasting colors initially to aid visualization.
-
Training Pads: Silicone pads with pre-cut incisions or designated areas for suturing are ideal for repetitive laparoscopic suturing practice.
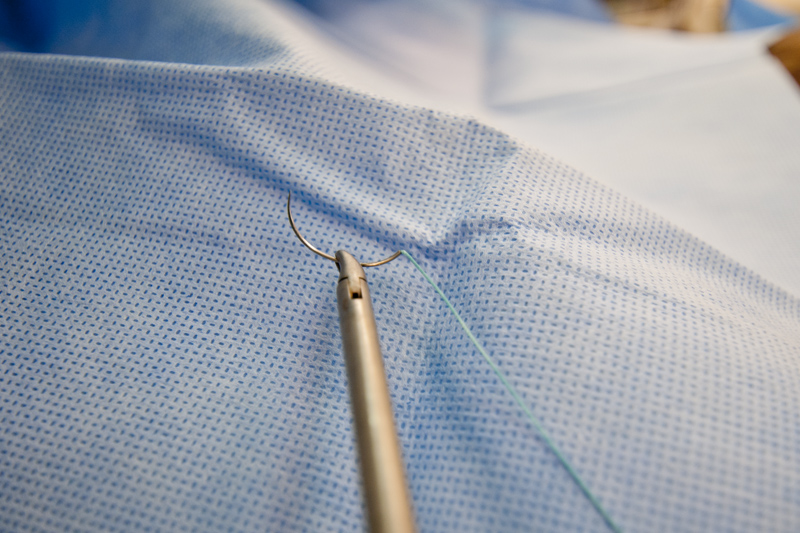
Step-by-Step Guide to the Intracorporeal Square Knot (The Gold Standard)
The square knot is the foundation of secure laparoscopic closure. We will describe the technique for a right-handed surgeon, with the needle driver in the right hand and grasping forceps in the left.
Phase 1: The First Throw (Creating the Loop)
-
Needle Preparation & Tissue Entry:
-
Load the needle into your needle driver, approximately two-thirds from the tip, ensuring the needle is perpendicular to the jaw.
-
Pass the needle through the tissue edges, ensuring symmetrical bites. Retrieve the needle, leaving a short tail (approx. 2-3 cm) on the side where the needle entered last.
-
-
Creating the Loop:
-
Needle Driver (Right Hand): Hold the needle driver with the tip resting over the suture strand, about 2-3 cm from the tissue.
-
Grasping Forceps (Left Hand): Create two full loops of the suture around the shaft of the closed needle driver, moving the forceps in a clockwise direction.
-
-
Grabbing the Tail:
-
Maintain the loops. Open your needle driver and reach through the formed loops to grasp the short tail of the suture.
-
-
Pulling Through the Loop:
-
Pull the needle driver and the tail back towards the left.
-
Simultaneously, use the left hand (grasping forceps) to gently pull the working strand in the opposite direction (towards the right). This creates the first throw.
-
Snug, Don’t Cinch: Guide the knot down to approximate the tissue. Avoid excessive force.
-
Phase 2: The Second Throw (Reversing the Loop)
This throw reverses the direction of the first, creating a square knot.
-
Needle Driver (Right Hand): Position the needle driver over the suture strand, 2-3 cm from the first knot.
-
Grasping Forceps (Left Hand): Create one full loop of the suture around the shaft of the closed needle driver, moving the forceps in a counter-clockwise direction. This reversal is critical for a secure square knot.
-
Grabbing the Tail:
-
Grasp the same short tail of the suture through the loop.
-
-
Pulling Through the Loop:
-
Pull the needle driver and the tail back towards the right.
-
Simultaneously, use the left hand to pull the working strand in the opposite direction (towards the left).
-
Snug and Square: Guide the knot down, ensuring it lays flat against the first throw.
-
Phase 3: The Third Throw (Security Throw)
A third throw (a repeat of the first throw, clockwise loop) or even a fourth is typically added for security, especially with slippery monofilament sutures.
-
Repeat First Throw: Follow the steps for the first throw (clockwise loop, grab tail, pull).
-
Secure: Cinch down the final throw firmly but carefully.
-
Cut: Use laparoscopic scissors to cut the suture tails, leaving 2-3mm to prevent unraveling.
Best Practices for Residents in Laparoscopic Training
-
Triangulation and Ergonomics: Optimal port placement allows for instrument approach at an ideal angle. Practice various scenarios within your laparoscopic training box setup.
-
Keep Instruments Parallel: Maintain the working ends of your instruments parallel to each other and perpendicular to the target tissue to improve control and reduce “fencing.”
-
Suture Management: The working strand must be kept taut. Use your non-dominant hand (forceps) to gently guide the suture and prevent tangles—a common frustration in laparoscopic suturing practice.
-
Controlled Tension: A secure knot is snug, not tight enough to cut through tissue. Consistent practice helps you develop the “feel” for appropriate resistance.
-
Ambidexterity: Make laparoscopic suturing practice a priority with both hands. Being able to tie efficiently with the left hand significantly enhances operative flexibility.
-
The Motto: Slow is Smooth, Smooth is Fast. Focus on precision and deliberate movements. Speed will follow mastery.
-
Video Review: Record your sessions on your laparoscopic simulator. Objective self-assessment is the fastest way to identify and correct inefficiencies.
Conclusion
Mastering the intracorporeal knot is a journey that demands patience, persistence, and dedicated laparoscopic training. It’s a skill that transcends specific procedures, becoming the ultimate hallmark of a minimally invasive surgeon.
By utilizing high-quality equipment like the GERATI Laparoscopic Training Box for focused laparoscopic suturing practice, meticulously following the steps, and adhering to best practices, residents can confidently progress from novice to proficient, unlocking the full potential of minimally invasive surgery.
Invest in your training, practice consistently, and remember: every square knot tied brings you closer to surgical excellence.
SEE GERATI RANGE OF LAPAROSCOPIC TRAINING SOLUTIONS.
Fundamentals of Laparoscopic Surgery (FLS) program